Custom Plush Size Guide: Design, Cost & Packaging | MSXTOYS

Custom Plush Size Guide: Choose Dimensions That Work for Design, Cost and Packaging
A character can look convincing as a small screen illustration and disappoint as a tiny sewn toy. The opposite problem also happens: a generously sized plush may preserve every facial detail, then prove awkward to display, box or ship. For a brand developing custom merchandise, plush size is a product decision, not just a number on a drawing.
This custom plush size guide explains how to compare compact, medium and larger formats before locking a sample. It covers design readability, pattern construction, measuring conventions, packaging footprint, and the evidence buyers should request when comparing two sizes. It does not set a universal “best size,” quote a factory price, or promise that a particular dimension is suitable for a particular age group.
Start with the job the plush must do
Before asking a manufacturer whether a character should be 10, 20 or 30 cm tall, describe where the finished object will live. A bag charm travels on hardware. A gift-with-purchase item may need to fit a campaign mailer. A retail plush has to occupy an intended shelf or display. A desk mascot needs a stable footprint, not simply a specified height.
For a launch brief, write one sentence that connects the audience, use and handling context: “An original character plush for a museum gift shop, designed to sit upright in a small retail box,” or “A lightweight promotional character that attaches to a bag.” These are illustrative briefs, not examples of MSXTOYS client projects.
Then separate three requirements: the visual requirement (features that make the character recognizable); the use requirement (held, displayed, carried or attached); and the channel requirement (shelf, event, fulfillment pack or gift box). If a size satisfies only one of the three, it is still an open decision.
What different size bands can—and cannot—tell you
Size labels are not standardized across custom plush suppliers. The following are illustrative comparison bands, not MSXTOYS production specifications or universal market thresholds. Actual feasibility depends on pattern shape, fabric, hardware, finished measurement points and the target product.
| Illustrative size direction | Useful questions | Design watchpoint | Packaging watchpoint |
|---|---|---|---|
| Compact, around 8–12 cm | Will it be a charm, collectible or small giveaway? | Can the face and identity-critical marks stay legible? | Does an attachment or header card change the overall pack size? |
| Small-to-medium, around 15–25 cm | Will it be handheld, displayed or sold as merchandise? | Does the intended pose hold after stuffing? | Will the plush fit the intended box without distorting its face or ears? |
| Medium-to-large, around 30–45 cm | Is the goal visual presence, hugging or premium gifting? | Is filling even and the silhouette supported? | What happens to carton count and shelf depth? |
| Oversized or display-focused | Must it sit, stand or remain in a fixed installation? | Do structure, balance and handling need separate development? | How will it be protected, stored and transported? |
A “20 cm plush” can be a short, wide seated animal, a narrow upright mascot or an unusual shape with long ears. Those products do not occupy the same shelf volume or require the same cutting layout. Treat each band as a starting point for questions, not a promise of price, sewing method or shipment cost.
Define exactly what the dimension measures
The phrase “20 cm high” is not a production instruction until the buyer and sample maker agree on the endpoints. A seated plush can have several legitimate heights. Long ears, a tuft of fabric, a removable hat and a loop for hanging can each change the overall measurement.
Record the pose and fixed measurement points
Specify whether height is measured standing or seated, whether ears or accessories are included, and whether the figure is supported in its natural resting pose. Add width and depth at named points rather than assuming a single height represents the whole form.
- Overall height: agreed topmost feature to base, with included and excluded features named.
- Body height: a separate measurement when ears or accessories would otherwise dominate the number.
- Head width and depth: useful when facial proportions matter more than total height.
- Sitting footprint: width and front-to-back depth in the intended displayed position.
- Attachment-inclusive size: particularly relevant when a keyring, loop or fixed accessory changes the maximum dimensions.
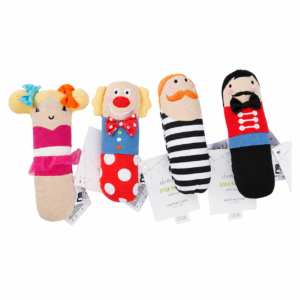
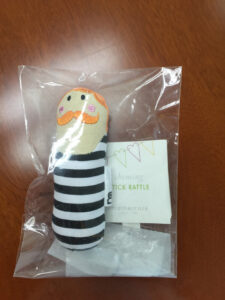
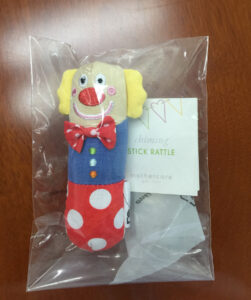
Use a marked photograph or dimensioned drawing showing where each measurement begins and ends. Record the measuring condition, such as “uncompressed, resting on a level surface.” A soft product will respond to squeezing, flattening and fabric pile; the agreed method matters as much as the number.
Do not invent a universal manufacturing tolerance
Finished plush dimensions can vary with textile stretch, seam formation, pile, stuffing and posture. That does not justify publishing a generic tolerance such as “all plush within plus or minus 1 cm.” The buyer should agree on product-specific measurement points, an acceptable range, a comparison sample and a method of checking before bulk production. A tolerance appropriate for one body shape may be unreasonable for a differently shaped or much smaller toy.
For a collection, add the SKU and size version to every dimension sheet. A 15 cm and a 30 cm character are not interchangeable references merely because they use the same illustration.
Why scaling artwork does not automatically scale the plush
Flat artwork scales mathematically. Sewing does not. Pattern pieces need seams, turning room and allowances for the behavior of fabric and filling. Narrow appendages, tightly curved panels and small color blocks may become disproportionately difficult when reduced. At a larger scale, the same silhouette can require fresh thinking about balance, filling distribution and how fabric supports the shape.
Preserve character recognition before decorative detail
At compact sizes, prioritize the silhouette, the relationship between head and body, and the strongest facial features. The eye spacing that looks clear on a screen may be crowded when rendered as embroidery on short-pile fabric. Tiny printed lettering may not be practical at the requested scale. A narrow fabric color patch can disappear visually once it includes seams.
Ask the pattern team to identify three classes of detail: must preserve (such as a distinct face shape), may simplify (minor decorative lines), and needs a physical trial (a small accessory, embroidered text or unusual fabric transition). The aim is not to make everything simple; it is to prevent a lower-priority detail from undermining the character’s expression.
Check decoration at the actual sewn scale
Embroidery, appliqué and print respond differently to the available surface. An embroidered logo must fit the curved, stuffed panel on which it will appear. Its placement may shift visually when the panel is curved or the fabric pile leans. A printed feature may look different on stretched fabric than on a flat proof. Where the detail is decisive, request a sample on the proposed material and size instead of approving a digital mockup alone.
An example decision is: “At the smaller size, retain the eye shape and the two-color face, but replace the tiny jacket lettering with a sewn brand label.” That is a design trade-off to test, not a universal manufacturing rule.
Size changes construction and hand feel in different ways
Two sizes of the same character can need separate patterns and separate sample approvals. A compact plush may use fewer broad shapes, but the turning and joining of small parts can be delicate. A larger plush may allow more expressive surfaces, yet reveal lumpy filling, sagging sections or unstable sitting posture more readily.
Ask what changes when the size changes: number of pattern pieces; seam placement; fabric pile direction; attachment strategy; fill distribution; firmness; decorative files; and any product-specific evaluation needs. These are potential review topics—not claims that every plush factory uses a particular equipment set or inspection method.
If a character is meant to stand or sit unaided, test that pose on a real surface. If it is designed to hang, evaluate how the attached product behaves in its intended orientation. Neither a beautiful front photograph nor a height specification proves those functions work.
Compare size options using the same design brief
When choosing between two feasible directions, use a controlled size comparison. Keep the character identity, essential colors, intended use, target market and key material feel constant, then ask what must change solely because of dimensions. This prevents a “smaller vs larger” comparison from quietly becoming “simpler vs more elaborate.”
| Comparison field | Smaller version | Larger version | Decision to record |
|---|---|---|---|
| Character readability | Which face or logo details need simplification? | Which details become clearer or too prominent? | Approved identity-critical details for each size |
| Finished dimensions | Named height, width and footprint | Same measurement definitions | Reference drawing and agreed range |
| Construction | Small panels, seams, hardware and turnability | Pose, panel support and filling distribution | Pattern or material changes requiring approval |
| Packaging | Attachment and individual pack | Box fit, carton quantity and display footprint | Required pack-out for each SKU |
| Commercial comparison | Quote for the defined smaller SKU | Quote for the defined larger SKU | Inclusions, quantities and open assumptions |
Illustrative decision: a buyer considers a 12 cm charm and a 22 cm seated mascot. The charm may meet portability goals but require a revised face and attachment design. The mascot may present the character better but occupy more retail and fulfillment space. The right choice depends on the campaign’s purpose; the comparison does not demonstrate that one version is always cheaper or safer.
If there is uncertainty about recognizable details, testing two physical scales may be more valuable than arguing over a single set of digital dimensions. Use the results to choose a production specification—not to assume a smaller or larger version inherits approval automatically.
Size affects costs, but height is not a price formula
A change in size can affect fabric area, filling, cutting layout, labor and packaging. The relationships are not uniform. A wide plush with complex side panels may consume more material than a taller narrow plush. Reducing height might save material while increasing the difficulty of sewing tiny features. A large, simple cushion-style form may be straightforward to assemble compared with a smaller character that has intricate clothing and embroidery.
Therefore, ask for separately identified quotations for each proposed size under the same design assumptions wherever practical. Confirm the SKU quantity, fabric, embroidery scope, accessories, packaging, testing and delivery basis for each. A low price based on losing a distinctive feature is not a like-for-like comparison.
For a fuller breakdown of project quotations rather than a size decision, see the custom plush cost guide. It addresses unit-price drivers and total project budget; this page stays focused on selecting the physical dimensions that make sense for the product.
Packaging is a second dimension decision
The uncompressed plush is only one object in the shipping plan. There is also the individual pack, retail display configuration and master carton. A 30 cm toy does not necessarily need a 30 cm box: ears may fold, the body may be seated, and protective clearance may be needed. Equally, a small hanging plush with a large header card can occupy more package space than its body suggests.
Prototype the packed product, not just the plush
Ask for an actual pack-out demonstration once the sample is sufficiently stable. Check whether the nose or embroidery is compressed, whether ears or accessories retain shape, whether labels remain visible, and whether the item can be removed and presented acceptably. For retail, check both the product dimensions and the shelf or peg space. For fulfillment, measure the actual packed dimensions—not the approximate dimensions of the bare plush.
Understand the difference between volume and a shipping quote
Parcel carriers may use dimensional or volumetric weight when pricing shipments. As the FedEx explanation of dimensional weight shows, package dimensions can matter in addition to actual weight. The carrier, service, packing arrangement and contract determine the calculation and charge. Bulk freight, carton loading and pallet plans require their own shipment-specific review; do not apply a parcel divisor to every transport scenario.
Request carton dimensions, units per carton, gross weight and proposed pack-out for each size after the physical format is confirmed. An estimated carton configuration before sampling is useful for planning, but it is not evidence of final shipping cost or confirmed loadability.
A size change may also reopen product review
Design teams sometimes treat a smaller version as a harmless derivative. That assumption can fail if the change affects attachments, construction, decoration, intended use or user group. A keychain-format product, for example, may introduce hardware and a different usage context. A larger version may change how the product is handled or packaged.
Product size alone does not establish suitability for a particular age. The U.S. Consumer Product Safety Commission’s children’s-product guidance explains that size is one factor among others in determining intended use. For an actual launch, buyers should review the target market, intended users, final construction and applicable testing and documentation with qualified parties. Do not treat an approved visual sample as a compliance conclusion.
A practical size-selection workflow for buyers
- Define the intended job. State whether the plush is a wearable charm, giveaway, collectible, shelf item, cuddle plush or display object.
- Choose two plausible size directions. Use real handling and display constraints instead of relying on “standard” sizes from unrelated products.
- Mark the dimensions. Identify pose, measurement points, ear or accessory inclusion, width, depth and footprint.
- Rank design details. Mark the face, silhouette, colors and branding that must survive reduction, and the details open to simplification.
- Request feasibility feedback. Ask which features, materials, pattern elements, attachments and packed dimensions change at each size.
- Review physical evidence. Where the decision is uncertain, compare actual prototypes or targeted samples using the same reference brief.
- Compare the full scope. Review quotes, packaging configuration, quantity per SKU, and open testing or delivery questions on a consistent basis.
- Lock the selected size. Record the approved sample version, written dimensions, accepted tolerances, packaging direction and conditions that trigger reapproval.
Size selection belongs early in development. The artwork-to-bulk manufacturing process guide explains how the approved product reference is transferred into production. It does not replace the narrower comparison above.
What to include when asking a manufacturer to compare two sizes
Send one message that makes the choice explicit. Include the same original artwork for both options, target use, two proposed sizes, agreed measurement method, required face and logo details, material direction, expected quantity per size, tentative packaging and the destination market. Ask the supplier to identify the size-dependent changes, not merely issue two unlabeled prices.
“We are comparing two sizes for the same original character: approximately 12 cm and 22 cm. Please evaluate both using the attached artwork and the marked measuring method. Eye shape, head-to-body proportion and two-color face are essential; small costume lettering can be simplified. Tell us which details or attachments need different construction, what the packed product may require, and which assumptions you need confirmed before quoting each version.”
This example is a suggested buyer message, not a claim about any MSXTOYS project or commercial policy. For broader enquiry preparation, the custom plush RFQ checklist covers quantities, materials, packaging, target market and other quotation inputs.
Questions buyers often ask
Is 20 cm the best size for a custom plush toy?
No single size suits all uses. A 20 cm direction can be worth comparing for some handheld or gift products, but the correct answer depends on character proportions, intended use, critical details, packaging and budget. Avoid adopting a supplier’s preferred size as an industry rule.
Will a 10 cm plush always cost less than a 30 cm plush?
Not necessarily on a like-for-like commercial basis. Less fabric and filling may be needed, but small seams, decoration and hardware can require extra work. Quantity, materials, packaging and delivery scope also change the quotation. Compare actual project specifications instead of height alone.
Can one approved plush design be produced in three sizes?
A size series may be possible, but each materially different size needs appropriate pattern, decoration, measurement and approval review. Share the original character identity across the series while recording each size as its own SKU and controlled specification.
Should I measure standing height or seated height?
Use the position the product is designed to occupy and name that position explicitly. For a character with tall ears or accessories, add a body measurement as well. If a retail box or shipping carton is the main constraint, record those limits separately.
Does a small plush automatically qualify as safe for a younger child?
No. Size by itself cannot establish age suitability or compliance. Intended audience, construction, materials, attachments, marketing context and destination-market rules require product-specific review.
When should the packaging size be finalized?
Define packaging constraints at the planning stage. Final fit, carton configuration and shipment estimates should be checked against the approved physical product and packaging prototype. Late changes in size can reopen packaging artwork and shipping assumptions.
Choose the size your whole project can support
There is no meaningful “best custom plush size” without a defined use and a product reference. Choose dimensions that preserve the character’s essential features, support the intended handling or display, and fit an achievable packaging plan. Record how the plush is measured, compare realistic alternatives and keep each size version connected to its own approved specification.
If your team is deciding between two custom plush formats or dimensions, send MSXTOYS the character artwork, proposed sizes, intended use and packaging constraints for a project-specific feasibility discussion. Any production capability, quotation, sample arrangement or schedule should be confirmed for the actual design.